THE DAY HAS FINALLY COME!!!!!
The Basic Drawing Tutorial made by yours truly is now ready for your enjoyment and learning experience!
Basic Drawing Tutorial
By: Tanaja S. Grier
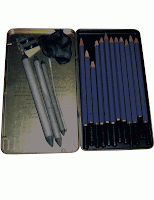
Step 1: Prepare your workspace. Lay out all of your materials and have a reference photo ready at your disposal. The materials you will be needing for this project is paper from any source, an easel if you prefer drawing with your work propped up, drawing pencils, sharpener, eraser, tortillions/stumps, and your reference picture.


Step 2: Find a blank sheet of paper or a blank page in your sketch book to draw on.
Step 3: Pick a point on the blank piece of paper and choose a part of your reference picture you want to start drawing the outline. Begin drawing the first part of your outline with your drawing pencils. Such as one of the lower petals.
Step 4: One at a time, draw parts of your reference picture. Draw the petal on the other side of the flower.
Step 5: Draw the front petal in the middle.
Step 6: Draw the remaining petals to complete the outline of the flower head.
Step 7: Draw the stem and the leaves.
Step 8: After you have completed the outline of your drawing. Go back into your drawing and sketch out the shadows on one petal that is shown in your reference picture.
Step 9: Sketch out the remaining shadows in your drawing until the entire outline is completely filled.
Step 10: Using your stumps, rub the sketch marks that represent your shadows until they are smooth. This technique helps to make your drawing look more real and show texture like in the reference picture. When you are finished, make the necessary corrections you feel you need to do and if you want to keep your drawing, sign your name and date at the bottom of the paper.
Congratulations! You have drawn a tulip!
For a more visual demonstration, refer to the either the diagram or the video clip below.
Thank you for watching and for participating! :-)


No comments:
Post a Comment