Tuesday, April 23, 2013

Basic Drawing Tutorial!

Hello Everyone,

THE DAY HAS FINALLY COME!!!!!

The Basic Drawing Tutorial made by yours truly is now ready for your enjoyment and learning experience!

Basic Drawing Tutorial

By: Tanaja S. Grier

Step 1: Prepare your workspace. Lay out all of your materials and have a reference photo ready at your disposal. The materials you will be needing for this project is paper from any source, an easel if you prefer drawing with your work propped up, drawing pencils, sharpener, eraser, tortillions/stumps, and your reference picture.
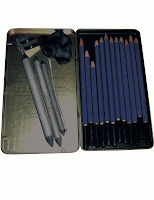
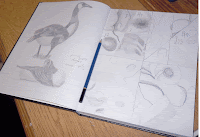


Step 2: Find a blank sheet of paper or a blank page in your sketch book to draw on.


Step 3: Pick a point on the blank piece of paper and choose a part of your reference picture you want to start drawing the outline. Begin drawing the first part of your outline with your drawing pencils. Such as one of the lower petals.


Step 4: One at a time, draw parts of your reference picture. Draw the petal on the other side of the flower.


Step 5: Draw the front petal in the middle.


Step 6: Draw the remaining petals to complete the outline of the flower head.


Step 7: Draw the stem and the leaves.


Step 8: After you have completed the outline of your drawing. Go back into your drawing and sketch out the shadows on one petal that is shown in your reference picture.


Step 9: Sketch out the remaining shadows in your drawing until the entire outline is completely filled. 

Step 10: Using your stumps, rub the sketch marks that represent your shadows until they are smooth. This technique helps to make your drawing look more real and show texture like in the reference picture. When you are finished, make the necessary corrections you feel you need to do and if you want to keep your drawing, sign your name and date at the bottom of the paper.


Congratulations! You have drawn a tulip!

For a more visual demonstration, refer to the either the diagram or the video clip below.


Thank you for watching and for participating! :-)


Monday, April 15, 2013

Diagram

Hello Everyone,
This is the diagram that will be included in my tutorial.

Monday, April 8, 2013

Edited Pictures

Hello Everyone,
These are the pictures edited in Photoshop. Observe as these pictures are more brighter, sharper, and more cleaner than the original untouched photos from the previous blog.


Wednesday, April 3, 2013

Original Photos

Hello Everyone,
These are the original pictures that will be edited for the final tutorial blog.


Monday, April 1, 2013

First Tutorial Video

Hello,
I have finally finished my tutorial video. I have great confidence in this video and hope that it matches up to the standards of an amature video posting that you would likely see on the Internet. I did this video one night at 4 am in the morning, so I apologize if my voice sounds a little dry and monotone because of my tiredness. The video is almost 10 minutes long, but it is not in the least boring and I believe that it catches the viewer's attention on the basics of drawing. So please enjoy and tell me what you think of my very first tutorial video on Basic Drawing!


Thank you for watching.

Sunday, March 17, 2013

Step-by-Step Tutorial

Hello Everyone,

I will be discussing the step by step process of the tutorial idea I have chosen from the last blog entry. I chose my first tutorial idea that consists of drawing a random object or figure with drawing pencils. That means that the final product will be a black and white drawing. Instead of having two seperate videos, the outline and the shading parts will be in one video. The object/figure will not a large or complicated and will most likely be a simple flower. Before I record my tuturial, I will already have my work area set up and my materials out and ready so I will not be fumbling to gather my things. This is the step by step of my tutorial:

Step 1:
Introduce myself. (0:05 mins.)

Step 2
State the topic of my tutorial. (0:05 mins.)

Step 3:
Make a few suggestions for a good work area. (0:10 mins.)

Step 4:
List the materials that will be needed for the drawing. (0:15 mins.)

Step 5:
Discuss the importance of a reference picture. (0:10 mins.)

Step 6
State the object that we will be drawing. (0:05 mins.)

Step 7:
Draw the outline. (3:30 mins.)

Step 8:
Shade the object in. (2:00 mins.)

Step 9:
Give tips on making your drawings better. (0:20 mins.)

Step 10:
End the tutorial. (0:05 mins.)

Monday, March 11, 2013

Prints and Binders

Hello Everyone,

Today in class, Mrs. Dersch brushed up on some important facts about printing projects created in the Adobe Creative Suites and identifying different kinds of binding for booklets, graphic books, etc.

Some Notes:

REMEMBER: Your print will always be darker than it looks on the screen so . . .

  • Adjust colors and photos accordingly.
  • Print proofs to review how your piece looks printed
  • Remember your color mode -> CMYK in Print; RGB in Web
PHOTOSHOP PHOTOS!!!

Projects with bleeds (colors covering the whole entire page) should be printed on larger paper than the document on screen.

A Few Basic Bindings:

Saddle Stitch -> Staple book (book held together by staples going down the middle.)

Comb Bind -> A binding that has teeth that holds the pages together. (Pages can be rearranged, added, and taken out easily.)

Spiral Bind -> A book held together by metal wire in the shape of a spiral. (ex. a notebook)

*Buy a Bone Folder (burnisher)!